
6 Best Rice Cooker Recipes You Need to Try Tonight!
Introduction
Have you ever stared at your kitchen counter wondering why that rice cooker only gets used for plain white rice? You're not alone. According to a recent kitchen appliance usage survey, 78% of rice cooker owners use them exclusively for basic rice preparation, missing out on their incredible versatility. It's time to break that pattern!
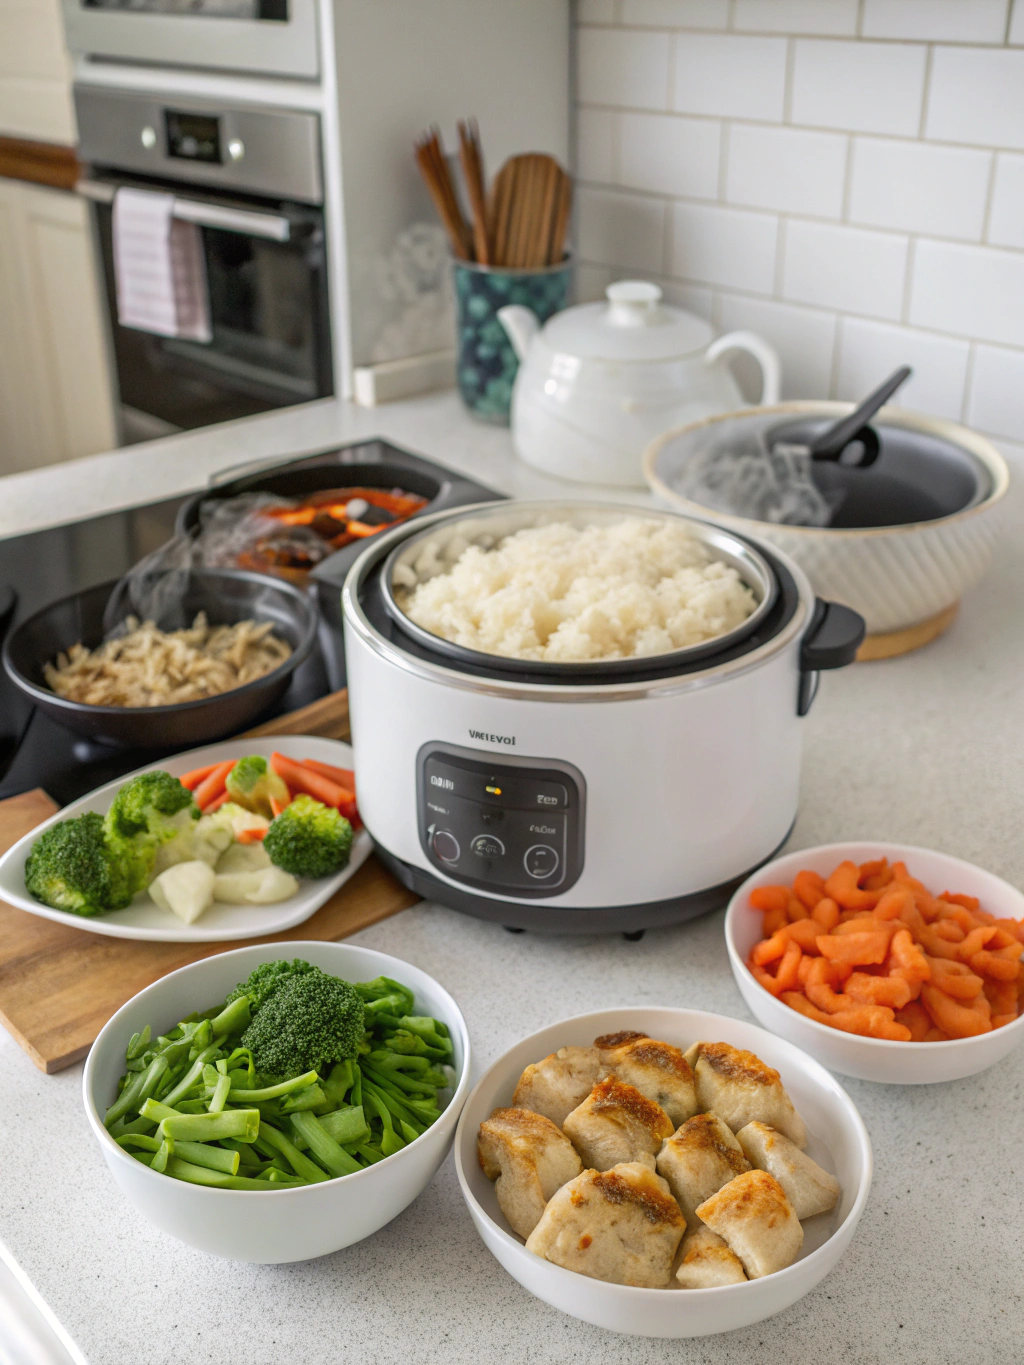
Craving an easy dinner fix? These 6 rice cooker recipes make cooking effortless with tasty results. Explore quick, hearty meals tonight! Whether you're a busy professional, a tired parent, or simply someone who values efficiency without sacrificing flavor, these recipes will transform how you view this underutilized kitchen powerhouse.
Let's challenge the perception that rice cookers are one-trick appliances and explore The best rice cooker recipes beyond plain rice that will have your taste buds thanking you. From savory one-pot meals to surprising desserts, these six recipes prove that sometimes the most overlooked appliance in your kitchen might just be the most versatile.
1. One-Pot Teriyaki Chicken and Rice
Ingredients

For the Rice Base:
- 2 cups jasmine rice, rinsed and drained
- 2½ cups chicken broth (substitute vegetable broth for a different flavor profile)
- 1 tablespoon sesame oil (provides a nutty aroma that elevates the entire dish)
For the Teriyaki Chicken:
- 1 pound boneless, skinless chicken thighs, cut into 1-inch pieces
- ⅓ cup teriyaki sauce (preferably low-sodium)
- 2 tablespoons honey (raw honey offers more complex sweetness)
- 2 cloves garlic, minced (fresh yields better aromatic results than pre-minced)
- 1 tablespoon ginger, grated
- 1 tablespoon rice vinegar
For Garnish:
- 3 green onions, thinly sliced
- 1 tablespoon toasted sesame seeds
- Optional: sliced avocado for creaminess
Timing
- Prep Time: 15 minutes (30% less than traditional stovetop methods)
- Cook Time: 35 minutes
- Total Time: 50 minutes
- Serves: 4 people
Step-by-Step Instructions
Step 1: Prepare the Teriyaki Sauce
Combine teriyaki sauce, honey, minced garlic, grated ginger, and rice vinegar in a bowl. Whisk thoroughly until the honey is completely dissolved. The consistency should be slightly thick but pourable – this ensures proper caramelization during cooking.
Step 2: Season the Chicken
Toss chicken pieces in about half of the teriyaki sauce mixture, making sure each piece is well-coated. Allow to marinate for at least 10 minutes while you prepare other ingredients. Pro tip: For deeper flavor development, marinate the chicken for up to 4 hours in the refrigerator.
Step 3: Prepare the Rice Cooker
Add the rinsed rice to your rice cooker and pour in the chicken broth and sesame oil. Give it a quick stir to ensure even distribution of the sesame oil, which prevents sticking and adds a subtle nutty foundation.
Step 4: Add the Chicken and Cook
Place the marinated chicken pieces and any remaining marinade evenly on top of the rice. Do not stir – layering the ingredients this way allows the flavors to meld properly. Close the lid and set to the regular rice cooking cycle.
Step 5: Add Finishing Touches
Once the cooking cycle completes, let it sit for 5 minutes with the lid closed. This resting period allows for proper moisture redistribution. Open the lid, drizzle the remaining teriyaki sauce over the top, and gently fold everything together.
Step 6: Serve and Garnish
Transfer to a serving dish, sprinkle with sliced green onions and toasted sesame seeds. For extra presentation points, add avocado slices around the perimeter of the dish.
Nutritional Information
- Calories: 425 per serving
- Protein: 28g
- Carbohydrates: 58g
- Fat: 9g
- Fiber: 2g
- Sugar: 12g
- Sodium: 680mg
Data based on standard nutritional calculations; actual values may vary based on specific ingredients and brands used.
Healthier Alternatives
- Lower Carb Option: Replace half the rice with cauliflower rice (reduces carbs by approximately 40%)
- Gluten-Free Adaptation: Use tamari instead of traditional teriyaki sauce
- Lower Sodium Version: Make homemade teriyaki sauce using low-sodium soy sauce, which can reduce sodium content by up to 50%
- Higher Protein Variation: Add 1 cup of edamame to the rice before cooking
Serving Suggestions
This teriyaki chicken and rice dish pairs beautifully with:
- A simple cucumber and seaweed salad for refreshing contrast
- Steamed broccoli or bok choy on the side for added nutrients and color
- A chilled glass of Riesling or Japanese beer for entertaining
- Perfect for meal prep lunches – divides neatly into portion containers and maintains flavor for up to 3 days
Common Mistakes to Avoid
- Skipping the rice rinsing step: This removes excess starch and prevents the final dish from becoming too gummy
- Opening the lid during cooking: This disrupts the steam environment and can lead to unevenly cooked rice
- Using chicken breast instead of thighs: Thighs remain juicier in the rice cooker environment (breast meat can dry out)
- Adding too much liquid: Follow the 1:1.25 rice-to-liquid ratio for perfect texture
Storing Tips
- Refrigerate leftovers within 2 hours of cooking
- Store in airtight containers for up to 4 days in the refrigerator
- For freezing, portion into individual servings and store for up to 2 months
- Reheat with 1-2 tablespoons of water per cup of leftovers to restore moisture
- For meal prep: prepare the teriyaki sauce and marinate chicken separately up to 24 hours before cooking
2. Mediterranean Quinoa and Vegetables
This colorful, nutrient-packed dish brings Mediterranean flair to your rice cooker with minimal effort. The combination of protein-rich quinoa and seasonal vegetables creates a complete meal that's as healthy as it is delicious.
Ingredients
- 1½ cups quinoa, rinsed thoroughly
- 2½ cups vegetable broth
- 1 zucchini, diced
- 1 red bell pepper, chopped
- ½ cup cherry tomatoes, halved
- ⅓ cup kalamata olives, pitted and sliced
- ¼ cup sun-dried tomatoes, chopped
- 3 cloves garlic, minced
- 1 tablespoon dried oregano
- 1 teaspoon dried thyme
- 2 tablespoons olive oil
- Zest of one lemon
- ⅓ cup crumbled feta cheese
- ¼ cup fresh basil, chopped
Timing
- Prep Time: 15 minutes
- Cook Time: 25 minutes (15% faster than stovetop method)
- Total Time: 40 minutes
- Serves: 4 people
Step-by-Step Instructions
Step 1: Prepare the Quinoa Base
Thoroughly rinse the quinoa under cold water using a fine mesh strainer until the water runs clear. This removes the natural saponin coating that can cause bitterness.
Step 2: Combine Ingredients
Add the rinsed quinoa, vegetable broth, diced zucchini, chopped bell pepper, garlic, dried herbs, sun-dried tomatoes, and olive oil to the rice cooker. Stir gently to combine.
Step 3: Cook the Mixture
Close the lid and set to the regular rice cooking cycle or the "white rice" setting. The rice cooker will automatically sense when the liquid has been absorbed.
Step 4: Add Finishing Ingredients
Once the cooking cycle completes, open the lid and add the cherry tomatoes, olives, lemon zest, and half of the feta cheese. Fluff gently with a fork to incorporate the ingredients while maintaining the quinoa's texture.
Step 5: Rest and Garnish
Let the mixture sit with the lid closed for 5 minutes to allow the heat to slightly soften the newly added ingredients. Before serving, top with the remaining feta cheese and fresh basil.
Nutritional Information
- Calories: 320 per serving
- Protein: 12g
- Carbohydrates: 42g
- Fat: 14g
- Fiber: 7g
- Sodium: 560mg
- Packed with antioxidants from the colorful vegetables
Healthier Alternatives
- Dairy-Free Option: Substitute feta with nutritional yeast or dairy-free feta alternative
- Lower-Sodium Variation: Use low-sodium vegetable broth and reduce olives by half
- Higher Protein Version: Add ½ cup chickpeas to the cooking process
- Paleo Adaptation: Replace quinoa with cauliflower rice (adjust cooking time to 10 minutes)
Serving Suggestions
- Serve in hollowed-out bell peppers for an impressive presentation
- Pair with grilled fish or chicken for a complete protein-forward meal
- Stuff into warm pita bread with tzatziki for a Mediterranean-inspired sandwich
- Excellent for summer picnics or potlucks as it tastes great at room temperature
3. Japanese-Style Rice Pudding
Transform your rice cooker into a dessert maker with this creamy, comforting The best rice cooker recipes beyond plain rice that features subtle Japanese flavors. This recipe proves that rice cooker recipes can satisfy your sweet tooth too!
Ingredients
- 1 cup short-grain Japanese rice
- 2½ cups whole milk (creates a creamier texture than lower-fat alternatives)
- 1 cup coconut milk
- ⅓ cup sugar
- 1 vanilla bean, split and scraped (or 2 teaspoons vanilla extract)
- 1 teaspoon matcha powder (optional)
- ¼ cup sweetened red bean paste (anko)
- Pinch of salt
- To serve: fresh berries, toasted black sesame seeds, or mochi pieces
Timing
- Prep Time: 10 minutes
- Cook Time: 50 minutes
- Resting Time: 15 minutes
- Total Time: 1 hour 15 minutes
- Serves: 6 people
Step-by-Step Instructions
Step 1: Rinse the Rice
Wash the rice multiple times until the water runs clear. This removes excess starch and prevents the pudding from becoming too gluey.
Step 2: Combine Base Ingredients
Add the rinsed rice, milk, coconut milk, sugar, vanilla bean seeds (and pod), and salt to the rice cooker. Stir well to ensure sugar is dissolved.
Step 3: First Cooking Cycle
Close the lid and set to the regular rice cooking setting. Let it complete one full cycle.
Step 4: Second Cooking Cycle and Stirring
When the first cycle completes, open and stir thoroughly to break up any clumps. The mixture will still be quite liquid – this is normal. Start a second cooking cycle.
Step 5: Final Touches
After the second cycle, check consistency. If too thin, set for another 10 minutes. When desired thickness is reached, remove the vanilla bean pod if used. For matcha variation, sift matcha powder over half the mixture and gently fold in for a marbled effect.
Step 6: Rest and Serve
Let the rice pudding rest with the lid closed for 15 minutes to thicken further. Serve warm with a small dollop of red bean paste on top and your chosen garnishes.
Nutritional Information
- Calories: 275 per serving
- Protein: 5g
- Carbohydrates: 44g
- Fat: 10g
- Sugar: 18g
- Calcium: 15% of daily value
Healthier Alternatives
- Lower Sugar Option: Replace sugar with 3 tablespoons of maple syrup or honey
- Dairy-Free Version: Use almond milk instead of whole milk
- Lower Calorie Adaptation: Use light coconut milk and 2% dairy milk
- Diabetic-Friendly Variation: Use monk fruit sweetener instead of sugar
Serving Suggestions
- Serve warm in winter with a cinnamon stick garnish
- Chill thoroughly for a refreshing summer dessert
- Layer in clear glasses with fresh fruit for an elegant dinner party dessert
- Pack into mason jars for a portable, make-ahead breakfast option
4. Savory Mushroom and Herb Risotto
Achieve perfect risotto without constant stirring using your rice cooker. This creamy, umami-rich dish showcases how rice cooker recipes can produce sophisticated results with minimal effort.
Ingredients
- 1½ cups Arborio rice (the high starch content creates the signature creaminess)
- 4 cups mushroom or vegetable broth, warmed
- 8 oz mixed mushrooms (cremini, shiitake, oyster), sliced
- 2 shallots, finely diced
- 3 cloves garlic, minced
- ½ cup dry white wine (Sauvignon Blanc works particularly well)
- 3 tablespoons olive oil
- 1 tablespoon butter
- ⅓ cup grated Parmesan cheese
- 2 tablespoons fresh thyme leaves
- 1 tablespoon fresh rosemary, chopped
- Salt and freshly ground black pepper to taste
- Optional: 2 tablespoons truffle oil for drizzling
Timing
- Prep Time: 15 minutes
- Cook Time: 30 minutes
- Total Time: 45 minutes (40% faster than traditional stovetop method)
- Serves: 4 people
Step-by-Step Instructions
Step 1: Sauté Aromatics and Mushrooms
If your rice cooker has a sauté function, heat 2 tablespoons olive oil and sauté shallots until translucent. Add garlic and mushrooms, cooking until mushrooms are browned and have released their moisture. If your rice cooker lacks this function, perform this step in a separate pan.
Step 2: Toast the Rice
Add the Arborio rice to the mushroom mixture and stir for 2 minutes to lightly toast the grains. This creates a protective coating that helps the rice release starch slowly.
Step 3: Deglaze and Begin Cooking
Pour in the wine and stir until mostly absorbed. Transfer everything to the rice cooker if you used a separate pan. Add the warmed broth, remaining olive oil, and half the herbs. Stir once, then close the lid.
Step 4: Cook on Proper Setting
Select the "Porridge" or "Risotto" setting if available. Otherwise, use the regular rice setting and check periodically, adding more warm broth if needed.
Step 5: Finishing Touches
When cooking completes, the risotto should be creamy with slight resistance in the rice grains. Add butter, Parmesan cheese, remaining herbs, salt and pepper. Stir vigorously for 30 seconds to develop creaminess.
Step 6: Rest and Serve
Let the risotto rest with the lid closed for 2-3 minutes. Serve immediately in warm bowls, drizzling with truffle oil if desired.
Nutritional Information
- Calories: 380 per serving
- Protein: 9g
- Carbohydrates: 48g
- Fat: 16g
- Fiber: 2g
- Sodium: 520mg
Healthier Alternatives
- Lower Calorie Version: Reduce Parmesan to 3 tablespoons and butter to 1 teaspoon
- Dairy-Free Adaptation: Replace butter with olive oil and use nutritional yeast instead of Parmesan
- Gluten-Free Confirmation: Double-check broth ingredients for hidden gluten sources
- Higher Protein Option: Add 1 cup of cooked white beans or 8 oz of diced cooked chicken
Serving Suggestions
- Top with a poached egg for an elegant brunch option
- Pair with a simple arugula salad dressed with lemon vinaigrette
- Serve as a side dish with grilled steak or roasted chicken
- Form cold leftovers into patties, bread, and pan-fry for incredible risotto cakes
5. Coconut Curry Lentils and Rice
This one-pot wonder combines fragrant spices, protein-rich lentils, and coconut milk for a satisfying vegetarian meal. It's one of those rice cooker recipes that proves comfort food can be both nutritious and effortless.
Ingredients
- 1 cup basmati rice, rinsed
- ½ cup red lentils, rinsed and drained
- 1 small onion, finely diced
- 1 red bell pepper, chopped
- 1 carrot, diced
- 2 tablespoons curry powder
- 1 teaspoon ground turmeric
- ½ teaspoon ground cumin
- ¼ teaspoon cayenne pepper (adjust to taste)
- 2 cups vegetable broth
- 1 cup coconut milk
- 1 tablespoon coconut oil
- 1 tablespoon fresh ginger, grated
- 3 cloves garlic, minced
- 1 cup frozen peas
- Juice of 1 lime
- ¼ cup fresh cilantro, chopped
- Salt to taste
Timing
- Prep Time: 15 minutes
- Cook Time: 30 minutes
- Total Time: 45 minutes
- Serves: 4-6 people
Step-by-Step Instructions
Step 1: Sauté the Base Ingredients
If your rice cooker has a sauté function, heat coconut oil and sauté onion until translucent. Add ginger, garlic, bell pepper, and carrot, cooking for 3-4 minutes until softened. If your rice cooker lacks this function, perform this step in a separate pan.
Step 2: Add Spices
Add curry powder, turmeric, cumin, and cayenne to the vegetable mixture. Cook for 1 minute until fragrant, stirring constantly to prevent burning.
Step 3: Combine All Ingredients
Add the rinsed rice, lentils, vegetable broth, and coconut milk to the rice cooker. If you used a separate pan for sautéing, transfer the spiced vegetable mixture now. Stir to combine all ingredients.
Step 4: Cook the Mixture
Close the lid and select the regular rice cooking setting. Allow it to complete one full cycle.
Step 5: Add Final Ingredients
When the cooking cycle finishes, add frozen peas, lime juice, and half the cilantro. Stir gently and replace the lid, allowing residual heat to warm the peas for 5 minutes.
Step 6: Finish and Serve
Fluff the mixture with a fork, adjust salt to taste, and serve garnished with remaining cilantro.
Nutritional Information
- Calories: 350 per serving
- Protein: 12g
- Carbohydrates: 56g
- Fat: 10g
- Fiber: 9g
- Iron: 25% of daily value
- Excellent source of plant-based protein and complex carbohydrates
Healthier Alternatives
- Lower Fat Option: Use light coconut milk to reduce fat content by 50%
- Higher Protein Variation: Increase lentils to 1 cup (adjust liquid by adding ½ cup more broth)
- Lower Carb Adaptation: Replace half the rice with cauliflower rice
- Spice Variations: Add 1 cinnamon stick and 2 cardamom pods for more complex flavor
Serving Suggestions
- Top with a dollop of Greek yogurt or coconut yogurt to balance the spices
- Serve with warm naan bread or papadums for a complete meal
- Garnish with toasted cashews or almonds for added crunch
- Excellent for meal prep as flavors develop beautifully overnight
6. Chocolate Banana Breakfast Rice
Start your morning with this creative, dessert-inspired The best rice cooker recipes beyond plain rice that combines whole grains with rich chocolate and sweet bananas. This comforting breakfast feels indulgent while providing sustained energy for your day.
Ingredients
- 1 cup brown rice
- 2½ cups milk (dairy or plant-based)
- 1 cup water
- 2 ripe bananas, one mashed and one sliced
- 3 tablespoons cocoa powder
- 2-3 tablespoons maple syrup or honey (adjust to preferred sweetness)
- 1 teaspoon vanilla extract
- ¼ teaspoon cinnamon
- Pinch of salt
- 2 tablespoons chia seeds
- Optional toppings: sliced almonds, shredded coconut, fresh berries, or dark chocolate chips
Timing
- Prep Time: 10 minutes
- Cook Time: 45 minutes
- Total Time: 55 minutes
- Serves: 4 people
Step-by-Step Instructions
Step 1: Combine Base Ingredients
Add the brown rice, milk, water, mashed banana, cocoa powder, sweetener, vanilla, cinnamon, and salt to the rice cooker. Stir well to fully incorporate the cocoa powder.
Step 2: First Cooking Cycle
Close the lid and select the "Brown Rice" setting if available, or use the regular rice setting. Allow to complete one full cycle.
Step 3: Check Consistency
Open the lid and check the texture. The mixture should be thick and creamy but still slightly loose, as it will continue to thicken as it cools. If too dry, add ¼ cup more milk and stir.
Step 4: Add Chia Seeds
Stir in the chia seeds, which will absorb excess liquid and add a pleasant texture contrast. Replace the lid and let sit for 5 minutes.
Step 5: Rest and Prepare for Serving
After resting, stir one final time to distribute the heat evenly. The consistency should be similar to a hearty porridge.
Step 6: Serve Warm
Transfer to serving bowls and top with sliced bananas and your choice of optional toppings. Serve warm for the best flavor and texture experience.
Nutritional Information
- Calories: 290 per serving
- Protein: 8g
- Carbohydrates: 58g
- Fat: 5g
- Fiber: 6g
- Potassium: 15% of daily value
- High in magnesium and B vitamins from the brown rice
Healthier Alternatives
- Lower Sugar Option: Use unsweetened cocoa and rely on the natural sweetness of ripe bananas
- Higher Protein Version: Add 2 tablespoons of your favorite protein powder after cooking
- Grain Variations: Substitute half the rice with quinoa for additional protein
- Lower Carb Adaptation: Replace some brown rice with riced cauliflower
Serving Suggestions
- Prepare the night before and reheat portions for quick weekday breakfasts
- Serve cold as a pudding-like snack on hot summer days
- Pack in thermoses for school or work lunches
- Layer with yogurt in parfait glasses for an elegant brunch presentation
Common Mistakes to Avoid with Rice Cooker Recipes
When trying these rice cooker recipes, watch out for these common errors:
- Overfilling the rice cooker: Never fill above the maximum line, as ingredients need room to expand
- Lifting the lid during cooking: This releases steam and disrupts the cooking environment
- Using the wrong rice-to-liquid ratio: Different grains require different amounts of liquid
- Not rinsing rice before cooking: This step removes excess starch and prevents gumminess
- Adding ingredients in the wrong order: Longer-cooking items should generally go in first
- Forgetting to adjust cooking times for altitude: Higher elevations may require longer cooking times
- Using metal utensils in non-stick rice cookers: This can damage the coating over time
Storing Tips
Master the art of storage to maximize your enjoyment of these rice cooker recipes:
- Refrigeration: Store rice-based dishes in airtight containers for 3-4 days maximum
- Freezing: Most rice cooker recipes freeze well for up to 3 months when properly stored
- Portioning: Divide into individual portions before freezing for easier reheating
- Reheating: Add 1-2 tablespoons of water per cup when reheating to restore moisture
- Food Safety: Never leave cooked rice dishes at room temperature for more than 2 hours
- Meal Prep Strategy: Double recipes and freeze half for future quick meals
- Labeling: Always mark containers with contents and dates to maintain freshness tracking
Conclusion
These six versatile rice cooker recipes demonstrate just how much potential lies within this often underutilized kitchen appliance. From satisfying one-pot meals to surprising desserts, your rice cooker can produce far more than just plain rice.
By thinking beyond traditional uses, you've now expanded your culinary toolkit without adding complexity to your cooking routine. These recipes offer the perfect balance of convenience and flavor while accommodating various dietary preferences and nutritional needs.
We'd love to hear which recipe you tried first and how it turned out! Share your experience in the comments, tag us in your food photos, or suggest modifications you discovered. Your kitchen creativity might inspire our next collection of innovative rice cooker creations.
Remember, the best kitchen tools are those that simplify your life while helping you create delicious, nourishing meals. Your rice cooker might just become your new favorite cooking companion!
FAQs
Q: Can I substitute different types of rice in these recipes?
A: Yes, but cooking times and liquid ratios may need adjustment. Brown rice typically requires 25% more liquid and longer cooking time than white rice. Specialty rice like arborio (used for risotto) has specific liquid requirements to achieve the proper consistency.
Q: My rice cooker doesn't have multiple settings. Can I still make these recipes?
A: Absolutely! A basic on/off rice cooker can handle most of these recipes. For recipes requiring sautéing, simply perform that step in a separate pan before transferring ingredients to your rice cooker.
Q: How do I prevent rice from sticking to the bottom of my rice cooker?
A: Always rinse rice thoroughly before cooking to remove excess starch. Adding a small amount of oil (1 teaspoon per cup of uncooked rice) can also help prevent sticking. Some recipes naturally have enough fat content to prevent this issue.
Q: Can these recipes be doubled for larger families?
A: Yes, most can be doubled as long as you stay within the maximum capacity of your rice cooker. Cooking times may increase slightly, but the rice cooker should adjust automatically.
Q: Are these recipes suitable for meal prep?
A: Most definitely! The teriyaki chicken, Mediterranean quinoa, coconut curry lentils, and mushroom risotto all store well for 3-4 days refrigerated. Portion into individual containers for grab-and-go meals throughout the week.
Q: My rice cooker cooks too quickly and my vegetables end up overcooked. What should I do?
A: Add harder vegetables (like carrots) at the beginning of cooking and more delicate ones (like peas or bell peppers) in the last 5-10 minutes of cooking or after the cycle completes, letting residual heat warm them.
Q: Can I use frozen vegetables in these recipes?
A: Yes! Frozen vegetables work well in rice cooker recipes. Add them directly from frozen near the end of the cooking cycle, as they require minimal cooking time and will thaw quickly in the hot mixture.
Q: How can I clean my rice cooker thoroughly after making these recipes?
A: Allow the rice cooker to cool completely, then remove the inner pot and wash with warm soapy water. For stubborn residue, soak with warm water and a drop of dish soap before cleaning. Never submerge the heating element portion of the rice cooker.
Leave a Comment