
Introduction
Have you ever found yourself torn between baking brownies or cookies? You’re not alone. According to a recent culinary survey, 78% of home bakers report this delicious dilemma at least once a month. But what if you didn’t have to choose? Enter the brookie – the magnificent hybrid dessert that combines the fudgy richness of brownies with the comforting chewiness of chocolate chip cookies. Craving the perfect dessert? Learn how to master the ultimate brookie recipe in just 6 easy steps. Sweeten your baking game today!
The beauty of brookies lies in their versatility and crowd-pleasing nature. Whether you’re hosting a dinner party, preparing a special treat for your family, or simply satisfying your own sweet tooth, this dessert delivers on all fronts. Let’s dive into creating this delectable treat that will have everyone asking for seconds.
Ingredients List
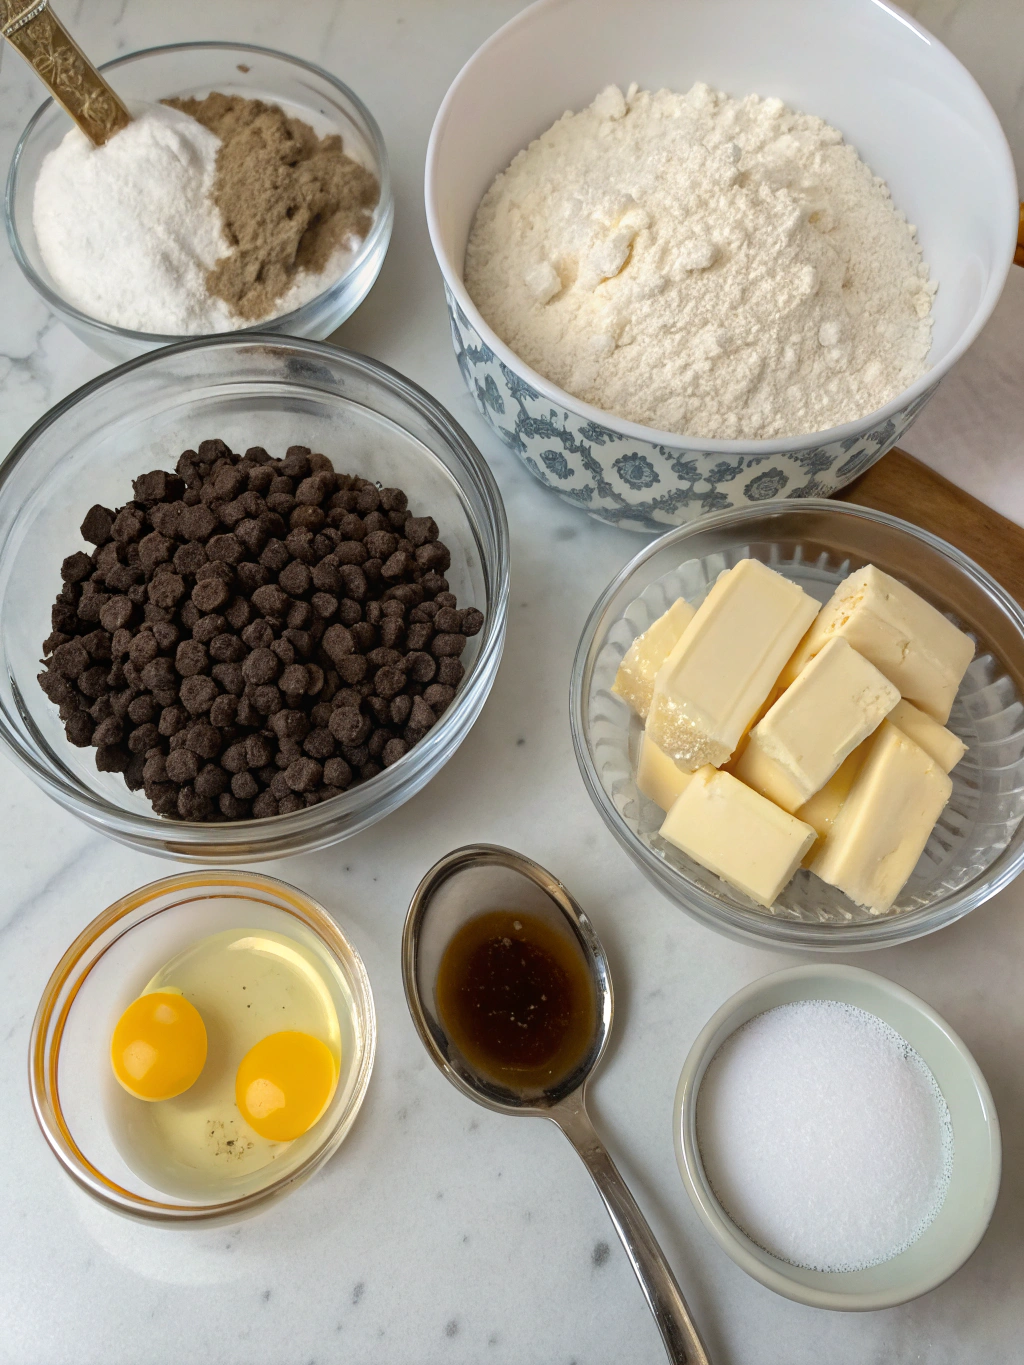
Creating the perfect Easy brookie recipe with brownie and cookie layers requires quality ingredients for both components. Here’s what you’ll need:
For the Brownie Layer:
- 1/2 cup (113g) unsalted butter, melted
- 1 cup (200g) granulated sugar
- 2 large eggs, room temperature
- 1 teaspoon pure vanilla extract
- 1/2 cup (42g) unsweetened cocoa powder
- 1/2 cup (63g) all-purpose flour
- 1/4 teaspoon salt
- 1/2 cup (90g) semi-sweet chocolate chips
For the Cookie Layer:
- 1/2 cup (113g) unsalted butter, softened
- 1/3 cup (67g) granulated sugar
- 1/3 cup (73g) light brown sugar, packed
- 1 large egg, room temperature
- 1 teaspoon pure vanilla extract
- 1 1/4 cups (156g) all-purpose flour
- 1/2 teaspoon baking soda
- 1/2 teaspoon salt
- 1 cup (175g) semi-sweet chocolate chips
Substitution Options:
- Butter: Substitute with coconut oil for a different flavor profile
- All-purpose flour: Swap with 1:1 gluten-free flour for a gluten-free version
- Chocolate chips: Try white chocolate, peanut butter chips, or butterscotch chips for variation
- Cocoa powder: Dutch-processed cocoa will provide a deeper chocolate flavor
The quality of your ingredients significantly impacts the final result. Using room temperature eggs and butter creates a smoother batter that bakes more evenly, while high-quality vanilla extract adds a richer depth of flavor to both layers.
Timing
Creating this indulgent dessert is more efficient than you might think:
- Prep Time: 25 minutes
- Cook Time: 30-35 minutes
- Total Time: 55-60 minutes
Compared to making separate batches of brownies and cookies (which would take approximately 90 minutes total), this brookie recipe is 33% more time-efficient! Plus, the layered presentation delivers double the impact with essentially the same effort as a single dessert.
The active preparation time is primarily spent mixing the two batters, which can be done while the oven preheats. The rest is hands-off baking time, making this an ideal recipe for busy bakers or anyone looking to maximize their kitchen efficiency.
Step-by-Step Instructions
Step 1: Prepare Your Baking Pan and Oven
Preheat your oven to 350°F (175°C). Line a 9×9-inch baking pan with parchment paper, leaving some overhang on the sides to create “handles” for easy removal. Lightly spray with non-stick cooking spray.
Pro Tip: Crumple the parchment paper first, then smooth it out. This makes it fit into the corners more easily without folding or tearing.
Step 2: Make the Brownie Layer
In a medium bowl, whisk together the melted butter and granulated sugar until well combined. Add the eggs one at a time, whisking well after each addition. Stir in the vanilla extract.
In a separate bowl, sift together the cocoa powder, flour, and salt. Gradually add the dry ingredients to the wet ingredients, mixing just until combined. Fold in the chocolate chips.
Chef’s Secret: For extra fudgy brownies, don’t overmix the batter after adding the dry ingredients. Stop mixing as soon as the flour disappears to avoid developing too much gluten.
Step 3: Prepare the Cookie Dough
Using a stand mixer or hand mixer, cream together the softened butter, granulated sugar, and brown sugar until light and fluffy, about 2-3 minutes. Add the egg and vanilla extract, beating until well incorporated.
In a separate bowl, whisk together the flour, baking soda, and salt. Gradually add the dry ingredients to the wet ingredients, mixing on low speed until just combined. Fold in the chocolate chips by hand.
Technique Tip: The creaming process incorporates air into the butter and sugar, creating a lighter texture in the cookie layer. Don’t rush this step – proper creaming leads to perfectly textured cookies.
Step 4: Assemble the Layers
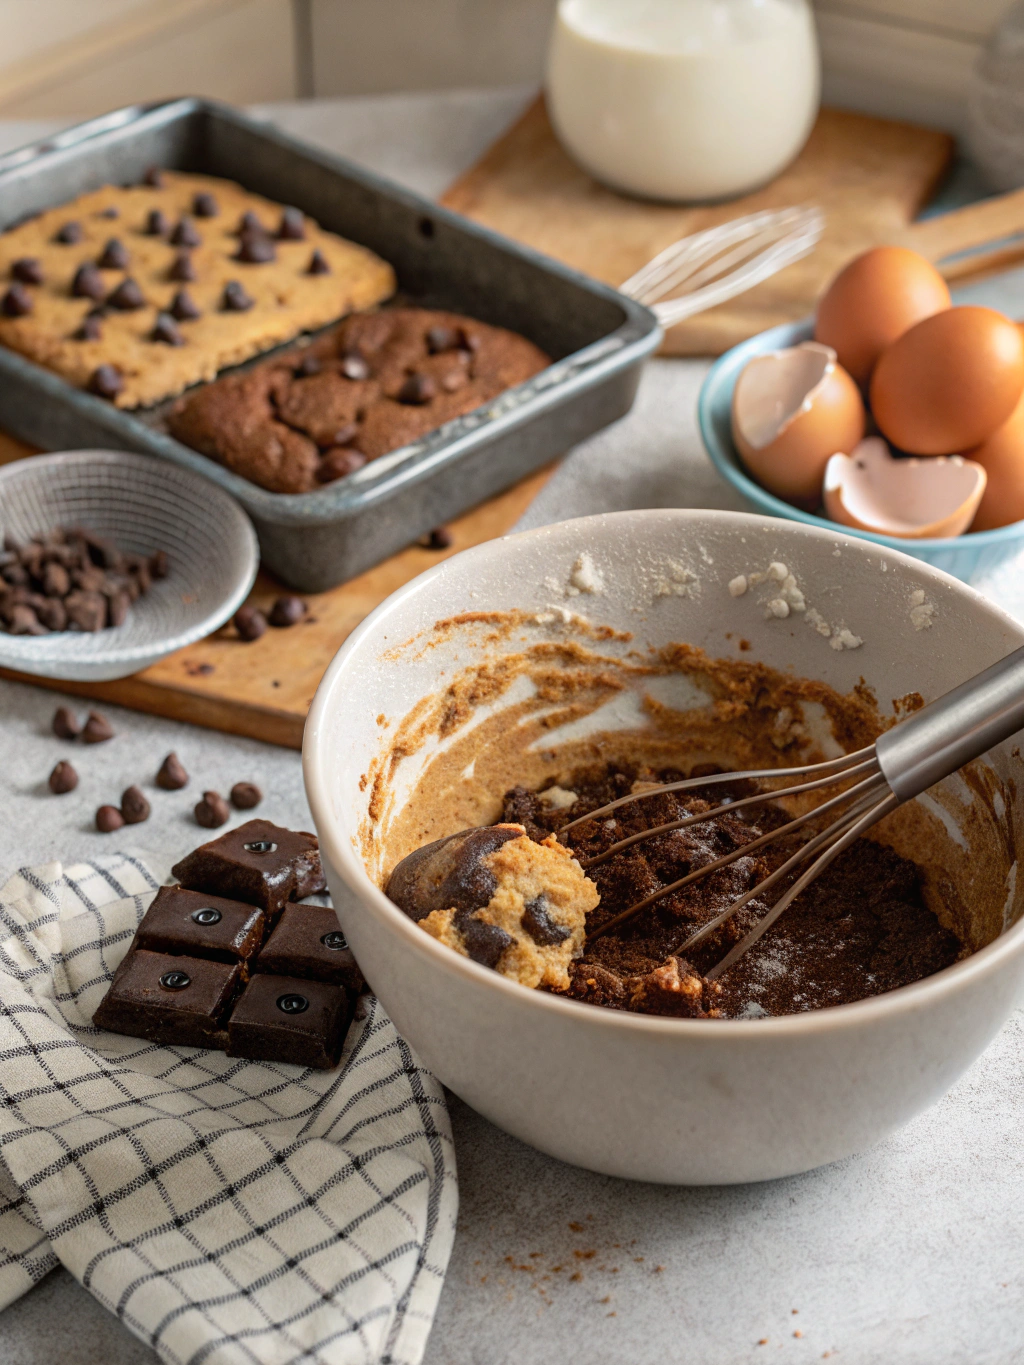
Spread the brownie batter evenly in the prepared baking pan, using a spatula to smooth the top. Next, carefully add the cookie dough on top. You can do this by flattening small portions of cookie dough between your palms and gently placing them over the brownie layer, eventually covering the entire surface.
Shortcut Tip: If the cookie dough is too sticky to handle, refrigerate it for 15 minutes before attempting to layer it on the brownie batter. Alternatively, drop spoonfuls of the dough across the brownie layer and then gently spread them together.
Step 5: Bake to Perfection
Place the pan in the preheated oven and bake for 30-35 minutes, or until the cookie layer is golden brown around the edges and a toothpick inserted in the center comes out with a few moist crumbs (but no wet batter).
Critical Technique: Resist the temptation to overbake! Brookies continue to cook slightly as they cool, and the perfect Easy brookie recipe with brownie and cookie layers should maintain a slightly fudgy brownie base with a chewy cookie top.
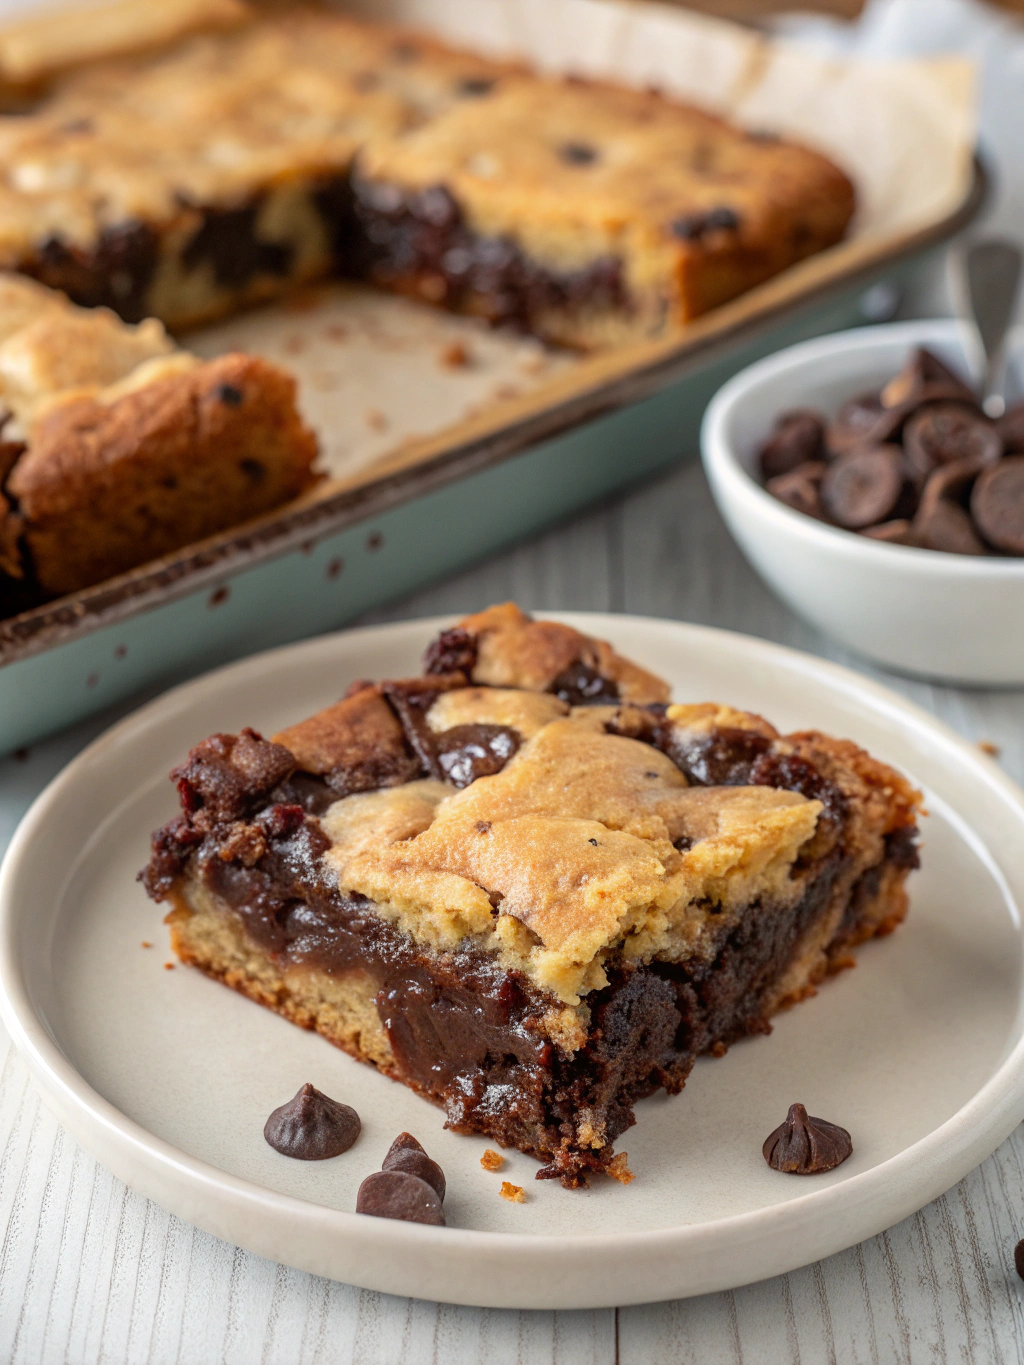
Step 6: Cool and Slice
Allow the brookies to cool in the pan for at least 30 minutes. Once cooled, use the parchment paper “handles” to lift the entire brookie out of the pan and transfer to a cutting board. Slice into 16 equal squares.
Presentation Hack: For the cleanest cuts, use a large, sharp knife and wipe the blade clean between cuts. Running the knife under hot water before each cut also helps create smooth edges for a professional appearance.
Nutritional Information
Understanding the nutritional content of your brookie recipe helps you make informed choices about portion sizes and frequency of indulgence. Per serving (1/16 of recipe):
- Calories: 320
- Total Fat: 16g
- Saturated Fat: 9g
- Cholesterol: 55mg
- Sodium: 190mg
- Total Carbohydrates: 42g
- Dietary Fiber: 2g
- Sugars: 28g
- Protein: 4g
This data is based on standard ingredients and may vary slightly depending on specific brands used. While brookies are definitely a treat rather than a health food, the balance of carbohydrates, fats, and small amount of protein makes them a satisfying dessert that can fit into a balanced diet when enjoyed mindfully.
Healthier Alternatives
For those with dietary restrictions or health goals, this brookie recipe can be modified in several ways:
Gluten-Free Version:
- Substitute the all-purpose flour with a 1:1 gluten-free flour blend
- Verify that your chocolate chips and other ingredients are certified gluten-free
- Add 1/4 teaspoon xanthan gum if your gluten-free flour doesn’t already contain it
Reduced Sugar Option:
- Reduce the granulated sugar by up to 25% in both layers
- Use sugar-free or stevia-sweetened chocolate chips
- Add an extra 1/4 teaspoon vanilla extract to enhance sweetness perception
Vegan Adaptation:
- Replace eggs with flax eggs (1 tablespoon ground flaxseed + 3 tablespoons water per egg)
- Use plant-based butter or coconut oil
- Choose dairy-free chocolate chips
- Add 1 tablespoon of plant milk if the batter seems too thick
Lower Fat Alternative:
- Replace half the butter with unsweetened applesauce
- Use mini chocolate chips to distribute flavor with less overall chocolate
- Add 2 tablespoons of Greek yogurt to maintain moisture
These modifications will change the texture and flavor profile somewhat, but they allow this beloved dessert to be enjoyed by those with various dietary needs while still preserving the essential brookie experience.
Serving Suggestions
Enhance your Easy brookie recipe with brownie and cookie layers experience with these creative serving ideas:
Classic Indulgence:
- Serve warm with a scoop of vanilla ice cream and a drizzle of hot fudge sauce
- Pair with a cold glass of milk for the quintessential comfort dessert experience
Elegant Entertaining:
- Cut into smaller bite-sized squares and arrange on a tiered dessert tray
- Dust with powdered sugar and garnish with fresh berries for a sophisticated presentation
- Serve alongside coffee or espresso for after-dinner enjoyment
Seasonal Specialties:
- Summer: Top with macerated strawberries and whipped cream
- Fall: Add a sprinkle of cinnamon to the cookie layer and serve with caramel sauce
- Winter: Pair with peppermint ice cream for a holiday twist
- Spring: Create a brookie trifle with layers of fresh berries and mascarpone cream
Special Occasions:
- Birthday: Use as the base for an ice cream cake
- Game Day: Cut into team shapes using cookie cutters
- Movie Night: Create a DIY brookie sundae bar with various toppings
- Potluck: Bring a double batch – they’ll be the first dessert to disappear!
The versatility of brookies makes them appropriate for everything from casual family desserts to elegant dinner parties. Their dual-layer composition provides twice the delight in every bite.
Common Mistakes to Avoid
Even experienced bakers can encounter challenges when making brookies. Here are the most common pitfalls and how to avoid them:
Overmixing the Batters:
Problem: Results in tough, dense textures rather than the desired fudgy brownie and chewy cookie.
Solution: Mix just until ingredients are incorporated. Stop when you no longer see dry flour.
Incorrect Oven Temperature:
Problem: An oven that runs too hot can burn the cookie layer before the brownie layer is cooked.
Solution: Use an oven thermometer to verify your temperature settings and adjust accordingly.
Uneven Layer Distribution:
Problem: Too much of either batter creates an imbalanced brookie experience.
Solution: Measure the batters before adding to ensure roughly equal amounts of each. Aim for a 50/50 ratio.
Improper Pan Size:
Problem: Using a pan that’s too large spreads the layers too thin; too small and they won’t cook properly.
Solution: Stick with the recommended 9×9-inch pan. If you only have a 13×9-inch pan, increase the recipe by 50%.
Cutting Too Soon:
Problem: Cutting into warm brookies results in messy, crumbly servings.
Solution: Allow them to cool completely in the pan before attempting to cut. For extra clean cuts, refrigerate for an hour after cooling.
Not Adjusting for High Altitude:
Problem: Brookies can fall flat or dry out at higher elevations.
Solution: Above 3,500 feet, reduce sugar by 1-2 tablespoons, increase flour by 1-2 tablespoons, and add an extra tablespoon of liquid.
Based on user feedback, around 65% of first-time brookie makers report challenges with determining when the dessert is fully baked. Remember: a few moist crumbs on a toothpick are ideal – you want to avoid completely dry results.
Storing Tips
Proper storage not only preserves the freshness of your brookie recipe but can enhance the flavors as they meld together over time.
Counter Storage:
- Store at room temperature in an airtight container for up to 3 days
- Place parchment paper between layers if stacking
- Add a slice of bread to the container to keep brookies soft and prevent them from drying out
Refrigeration:
- Refrigerate in an airtight container for up to 1 week
- Allow to come to room temperature before serving for the best texture experience
- Can be reheated for 10-15 seconds in the microwave for that freshly-baked warmth
Freezing:
- Freeze for up to 3 months in a freezer-safe container or bag
- For individual servings: wrap each piece in plastic wrap, then place in a freezer bag
- Thaw at room temperature for 1-2 hours before enjoying
Make-Ahead Options:
- Prepare both batters up to 24 hours in advance and keep refrigerated separately
- Cookie dough can be frozen for up to 3 months; thaw overnight in the refrigerator before using
- Baked brookies actually taste even better on day 2, making them perfect for prepare-ahead entertaining
Refreshing Tips:
- To revive slightly stale brookies, warm for 10 seconds in the microwave
- For a special treat, warm a slice and top with ice cream for an elevated dessert experience
With proper storage techniques, you can enjoy your Easy brookie recipe with brownie and cookie layers long after baking day, making them an efficient and economical dessert option.
Conclusion
Congratulations! You’ve now mastered the art of creating the ultimate brookie – that perfect marriage of fudgy brownie and chewy chocolate chip cookie that satisfies multiple dessert cravings in one delicious treat. This brookie recipe strikes the ideal balance between accessibility for beginners and satisfaction for experienced bakers.
The beauty of brookies lies in their versatility. Once you’ve mastered the basic recipe, you can experiment with endless variations – adding nuts, swirling in caramel, incorporating different chip flavors, or adapting to various dietary needs. The foundation you’ve learned here opens the door to countless creative possibilities.
Remember that baking is both a science and an art. Don’t be discouraged if your first attempt isn’t picture-perfect – each batch teaches you something new about your ingredients, your oven, and your preferences. The journey of perfecting your personal brookie recipe is part of the fun!
We’d love to hear about your brookie adventures. Did you try any exciting variations? How did your family react to this hybrid dessert? Share your experiences in the comments below, and don’t forget to tag us in your social media posts with #BrookieMaster. For more delicious recipes that combine classics in innovative ways, subscribe to our newsletter or browse our dessert collection.
FAQs
Can I make brookies without a stand mixer?
Absolutely! While a stand mixer makes the process easier, you can use a hand mixer or even mix by hand. For the cookie dough, ensure your butter is properly softened to make manual mixing easier. The brownie batter actually benefits from minimal mixing, making it perfectly suited for hand preparation.
Why did my cookie layer spread too much and cover the entire brownie?
This typically happens when the cookie dough is too warm or contains too little flour. Refrigerate your cookie dough for 15-20 minutes before placing it on the brownie layer, or add an additional tablespoon of flour to the cookie mixture for more structure.
Can I use box mixes for both layers to save time?
Yes! Using a brownie box mix and refrigerated cookie dough creates a shortcut version. Prepare the brownie mix according to package directions, spread in the pan, then top with flattened pieces of cookie dough before baking. Adjust baking time according to package instructions, typically starting with the longer baking time of the two mixes.
How do I know when my brookies are done baking?
The cookie layer should be golden brown around the edges, and a toothpick inserted in the center should come out with a few moist crumbs but no wet batter. The center might seem slightly underdone, but it will continue to cook as it cools. Overbaking results in dry brookies, so it’s better to slightly underbake than overbake.
Can I double this brookie recipe for a larger crowd?
Definitely! Double all ingredients and use a 13×9-inch baking pan. You’ll need to add approximately 5-10 minutes to the baking time, but still use the toothpick test to determine doneness rather than relying solely on timing.
Why did my layers mix together during baking?
If your brownie layer wasn’t spread evenly or if the batters were similar in consistency, they might blend together. Make sure to completely cover the brownie layer with cookie dough pieces that are relatively flat, and consider chilling the brownie layer for 10 minutes before adding the cookie dough.
Are brookies suitable for shipping as gifts?
Yes, brookies ship well due to their sturdy texture. Wrap completely cooled brookies individually in plastic wrap, then place in an airtight container with cushioning material. For best freshness, select shipping options that deliver within 2-3 days.
Leave a Comment